
__________________________________________________
while working on my transmission i verified a hunch i had.
my passenger side front axle shaft u-joint was noisy..
..i had heard it clicking while driving for a while.
further inspection confirmed that it was toast.
it was high time i replaced that u-joint!
recently, i got a parking place in the garage.
its always a pleasure working in a nice garage!
what a great contrast to working in the rocky and uneven street.
a lovely mountain breeze filled my lungs and cooled my skin.
the concrete is smooth and there are power outlets at hand!
__________________________________________________

__________________________________________________
STEP 1.)
break the lug nuts
__________________________________________________
this step must be done before you raise and support the jeep.
resistance from the vehicle weight is required to loosen the nuts.
there are five of them...

__________________________________________________
STEP 2.)
raise and support the vehicle
__________________________________________________
the jeep must be raised just enough to get the wheel off.
i always place jack stands under the axle tube at each control arm.
it is safe to use the differential or the axle tubes as lifting points.

__________________________________________________
STEP 3.)
remove the brake caliper
__________________________________________________
the caliper is controlled with hydraulics - aka brake fluid.
it exerts pressure on brake pads which grip the brake rotor.
2 bolts hold the caliper to the steering knuckle.

__________________________________________________
STEP 4.)
remove the brake rotor
__________________________________________________
the rotor rotates with the wheel through its alignment with the 5 wheel studs.
it is squeezed by the caliper's brake pads when braking to stop the wheel.
it is only restrained by the caliper, so it can simply be removed.
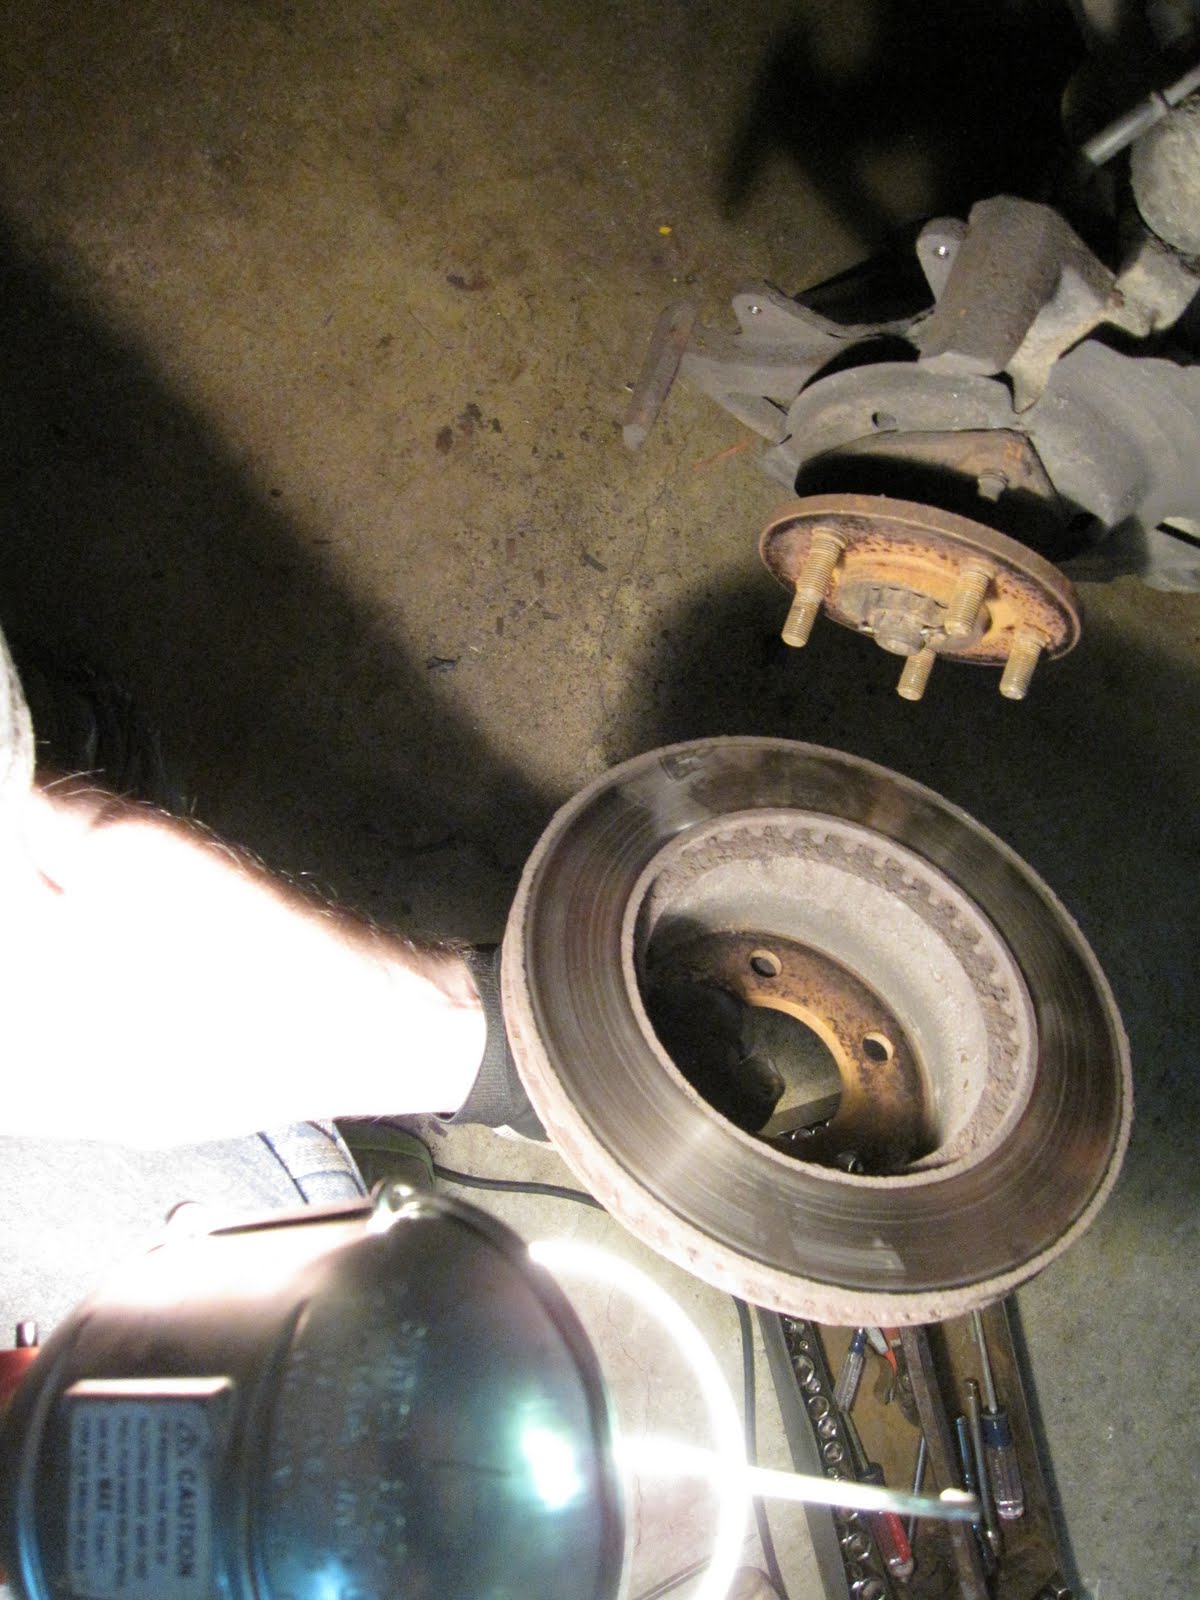
__________________________________________________
STEP 5.)
unbolt the hub assembly from the steering knuckle
__________________________________________________
the hub assembly connects the axle shaft to the wheel.
it is bolted to the steering knuckle with 3 12-point bolts.


__________________________________________________
STEP 6.)
separate the hub and shaft assembly from the steering knuckle
__________________________________________________
my hub was surface rusted to the steering knuckle.
i used a piece of wood to knock it loose from the inside out.

when the hub is freed, the axle shaft slides out of the axle tube.

note the engagement splines opposite the hub - near my hand.
this is how power is transferred from the differential through the shaft.

with the shaft removed, the empty axle tube is visible through the knuckle.

at this point, its a good idea to wrap the axle splines to prevent damage.
i used a cloth and some duck tape.

__________________________________________________
STEP 7.)
remove c-clips from u-joint
__________________________________________________
each of the 4 u-joint bearing caps are retained with c-clips.
they tend to get rusted in the grooves of the u-joint caps.
mine were no exception.
i hit the joint and the thick part of the shaft ears with a hammer.
that process tends to loosen things up a bit and make for easier removal.
then i used a small punch to remove the c-clips from the caps.

here you can see that i have started to work one c-clip out of its groove.

look closely at the stub-shaft (outer) side of the u-joint.
the tone ring - a square toothed gear - is pressed on the stub shaft.
its a component of the automatic braking system used to indicate locked brakes.
it also makes the angles for removing the c-clips almost impossible...
@#*%&@#)^(
removing these little bastards took most of my time during this project!

__________________________________________________
SIDE NOTE
my harbor freight u-joint press
__________________________________________________
i have always wanted this thing to work like magic.
but it has always just made things harder for me.
i seem to struggle with the alignment shifting as i apply more pressure.

using it is like working upside down or something...
: )

__________________________________________________
STEP 8.)
remove u-joint from axle shaft
__________________________________________________
hammering is the easiest way to start to remove the u-joint.
A.)
* place the stub shaft on a block of wood
* ensure that the long shaft's ears are facing up and down
* the long shaft's u-joint cap must have clearance overhanging the wood
* hit the long shaft repeatedly on the thick part of the shaft's ear
the goal is to force the bottom cap out of the ear.
B.)
once the first cap is out, a socket can be used to remove the other side.
* use a socket slightly smaller than the cap diameter
* insert the socket where the removed bearing cap was
* with the socket against the wood block, hammer away on the ear
here, the u-joint cap is starting to come out of the shaft ear.
the vice is misleading - i didn't use it at all because its jaws were too small

the needle bearings in this joint have been ground to dust.
this 'ground to dust phenomenon' is pretty common for an overly worn u-joint.

repeat the process on the opposite side to separate the shafts.

here you can see the old u-joint and the new.
also note the separated axle shafts, inner and outer.
the outer shaft is 'shrouded' by the tone ring and the hub assembly.
the hub can be removed from the shaft, but it is unnecessary for this procedure.

__________________________________________________
STEP 9.)
install the new u-joint
__________________________________________________
installation is the inverse of removal.

be careful not to knock over any needle bearings when installing the new caps.
you don't want one to lie flat and interfere with the u-joint installation..
..or you'll have to do it all over again (luckily i caught this before hammering)
i removed the cap and straitened the needle bearings with a screwdriver.
always install new c-clips in the cap grooves.

the final product - a new u-joint is installed and ready for 4wd action!

don't forget to add gear lube to the splines and seal surface.
this is the last step before reinstalling the shaft in the jeep!

No comments:
Post a Comment